
Sign In & Explore
Here we’ll introduce you to some of the most useful features in your MangoApps. Learn more about changing your settings, using your company Intranet, and how Teams are organized.
We’ve designed MangoApps to be as intuitive as possible, so the best way to learn how it works is to sign in and explore. Here are some pointers for anyone logging in for the first time.
Change My Settings
If you’ve never logged in to MangoApps before, you may be wondering where to begin. For starters, if you haven’t already, read our Take User Interface Tour chapter, so you have an idea of where and what everything is. Next, we advise new users to change their settings.
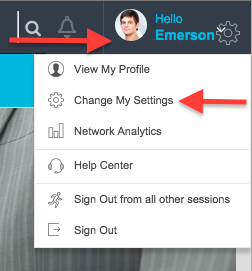
Access your user settings by selecting the Hello icon in the upper right corner of your screen. Then hit the Change My Settings link.
Here you can complete your user profile with your name, background, education, and more and upload your profile picture.
What’s next? Set the appropriate time zone, time format, and date format for your MangoApps by selecting Locale Settings on your left sidebar. In addition to modifying your MangoApps time and date, you can set a language for you MangoApps here.
You will also be able to adjust which email notifications you receive including updates from teams, others commenting on your posts, or when you are invited to an event. Go to the Home Links settings to customize the shortcuts shown on the left hand navigation as well.
Your Company Intranet
At this point, you’re welcome to do whatever you like, but if you’d still like some guidance, try taking a look at the Company pages. You can then navigate to either the Company Info section or Company News posts. These can fill you in on what’s happening in your company and also grant you access to important news, resources, and information. They are both located on your left sidebar.
Click on Company News to access timely updates about your company. Try visiting this page frequently to stay up to date on company news and current events. Visit your Company Info page by clicking on the Company Info link. Here you’ll likely find longstanding company resources, such as HR forms, company policies, your company directory, and more. Instead of visiting HR in person or paging through your employee handbook, try looking here for work resources instead.
Your News Feed
The News Feed is the Grand Central Station for all of the items you are following. In your news feed, you’ll see when anyone you’re following or anyone who shares a Team with you makes an update. You can respond, comment, like, create tasks, and more right from the News Feed.
Your Followers
Following colleagues will ensure you receive updates on any content they share. Whether they are sharing information in a Team you both share or uploading a document, you will see the activity they make in your activity stream. Following a colleague will make them appear in your MangoApps Messenger chat list. And, depending on your MangoApps email notification settings, you may also receive an email when a colleague you follow does the following:
- Posts a domain-wide status update
- Creates a wiki in a Team you belong to
- Creates a task assigned to you
- Submits an idea
- Invites you to an event
- Shares a document with you
To follow a colleague, click on the People tab on the left-hand navigation. Here you can follow colleagues by clicking on the gray star in the upper left corner of their profile photo. The star turns blue after you’re following the colleague. Learn more about Following colleagues in MangoApps in this Follow Colleagues you Work With help article.
Your Teams: Projects, Groups, and Departments
Projects
Projects are our most feature rich workspaces. They have a feed, members list, and more than 15 additional modules that can be added to suit your company’s needs.
Projects are geared toward getting your projects, assignments, and tasks done in less time with better visibility and communication within your teams, both internally and externally with partners or customers.
All members can add users to Projects. Access your Projects by clicking on the Projects tab on the left-hand navigation. By clicking on Projects it will take you to All Projects by default, but you can change the view by clicking the All Projects dropdown.
Pin any Projects that you think you will need access to often by clicking on the tiny gray tack icon in the upper right corner of the Project’s profile picture. After pinning a Project, it will appear on the right-hand side of the Projects dashboard.
Departments
Departments can be created in MangoApps for users who often work together. They provide a place, which can be public or private, for users to share updates, files, and more. Most customers create one for each of their company’s actual departments, such as IT, HR, Sales, and so on. Network Admins or Department Admins have the ability to create and add users to Departments.
You can view all Departments in your Domain by selecting the Departments tab on the left-hand navigation. This will take you to a page that displays all Departments in your company. Any Departments with a small lock icon are private. You can see which Departments you’re a member of by selecting My Departments from the dropdown menu.
Groups
Groups are peer-to-peer forums designed for group discussions on topics you and your colleagues find similar, such as job location or job function. Access your Groups by selecting the Groups tab on the left-hand navigation. This will take you to a page that displays all Groups. Click on any Group to access it.
After exploring these main pages, you should feel a little more comfortable using MangoApps. Again, make sure to check out the Take User Interface Tour chapter for information on important areas of MangoApps.